TREX - COST CALCULATOR
The Background: Material cost is one of the cornerstone factors that consumers take into consideration when shopping for composite decking, and Trex knew it had an opportunity to offer a best-in-class calculator experience that also acts as the first step in the consumer funnel for many users driving to Trex.com.
The Problem: Users were not continuing through all of the tool steps to get their results, and subsequently did not opt in to Trex's email capture to receive a detailed calculation. This conversion was critical for Trex. Our mission was to strategically analyze and evolve the Cost Calculator tool, modernizing and making enhancements to the tool that improved the overall UX, increased engagement and ultimately drove higher conversion rates.
The Result: A beautifully designed tool that articulates all possible material cost variables between two experiences: a “Quick Estimate” and a “Detailed Estimate”. In its first two months of being live, Trex has already reported an increase of 57% more email captures since our design has been implemented.
See both versions of the experience for yourself, here! For the sake of not having a never-ending page, I’m showing the “Detailed Estimate” below. Both tablet and mobile versions of the experience can be provided at request.
Cost Calculator - DETailed Estimate
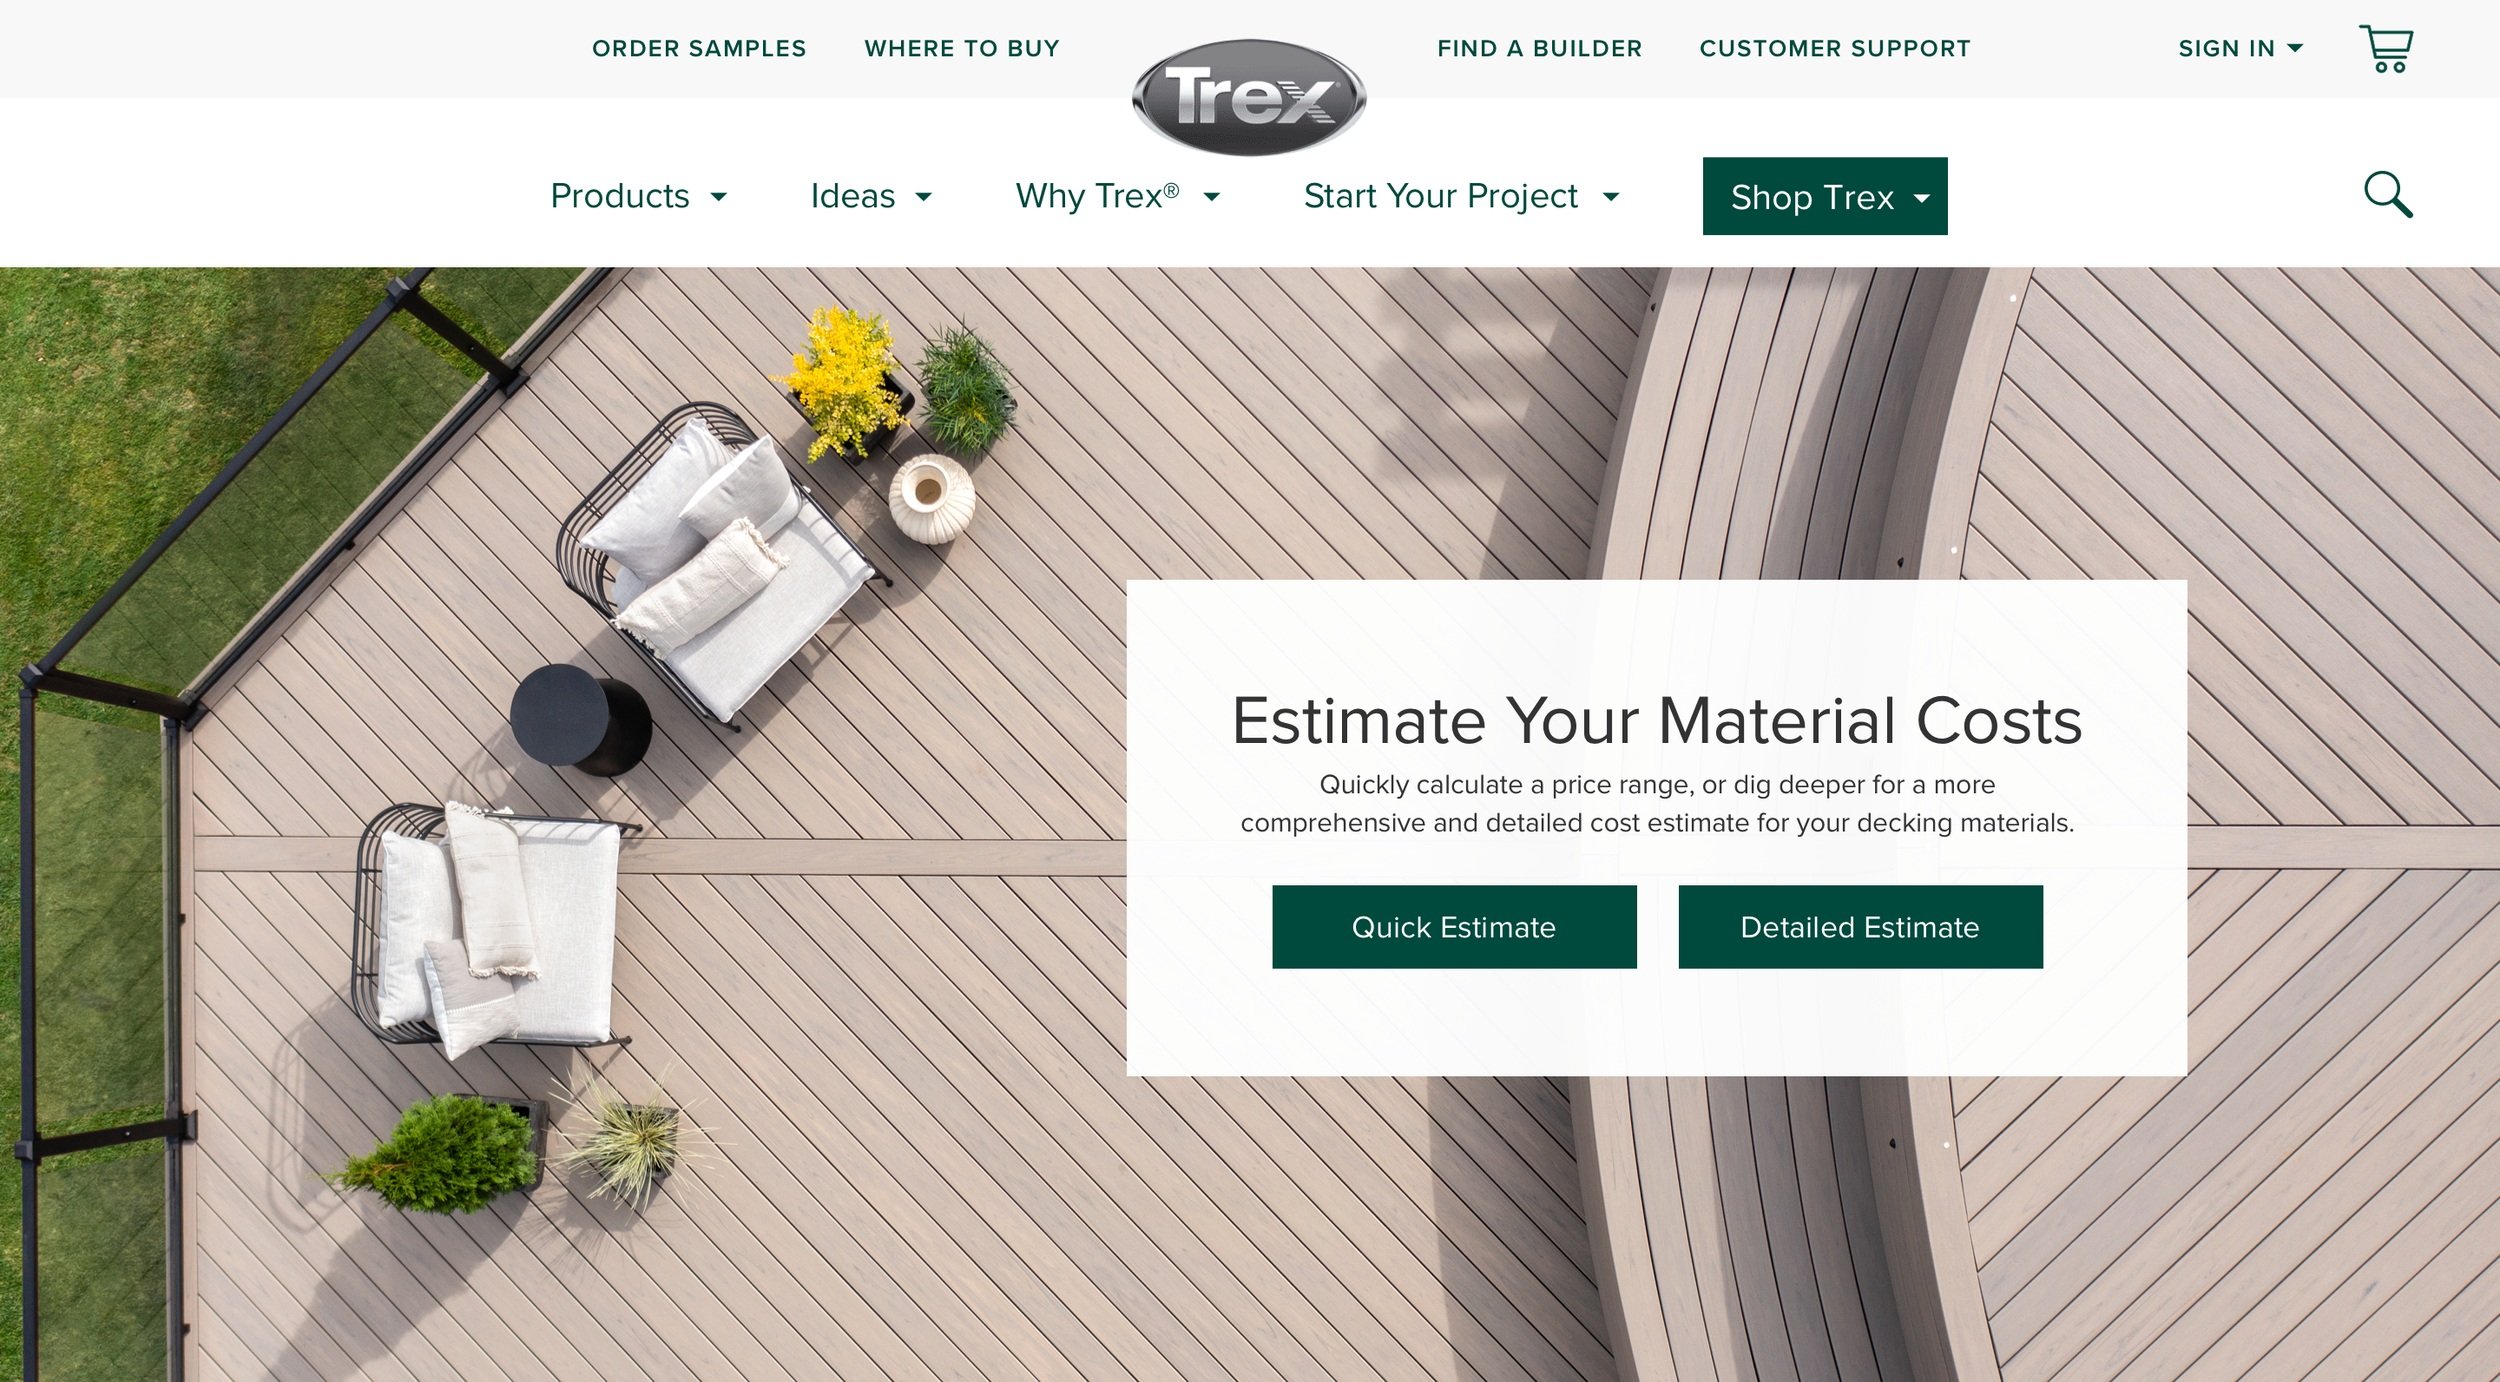
Introduction: This is the home page of the Cost Calculator tool, which can be found under the tab, “Start Your Project”.
STEP ONE:
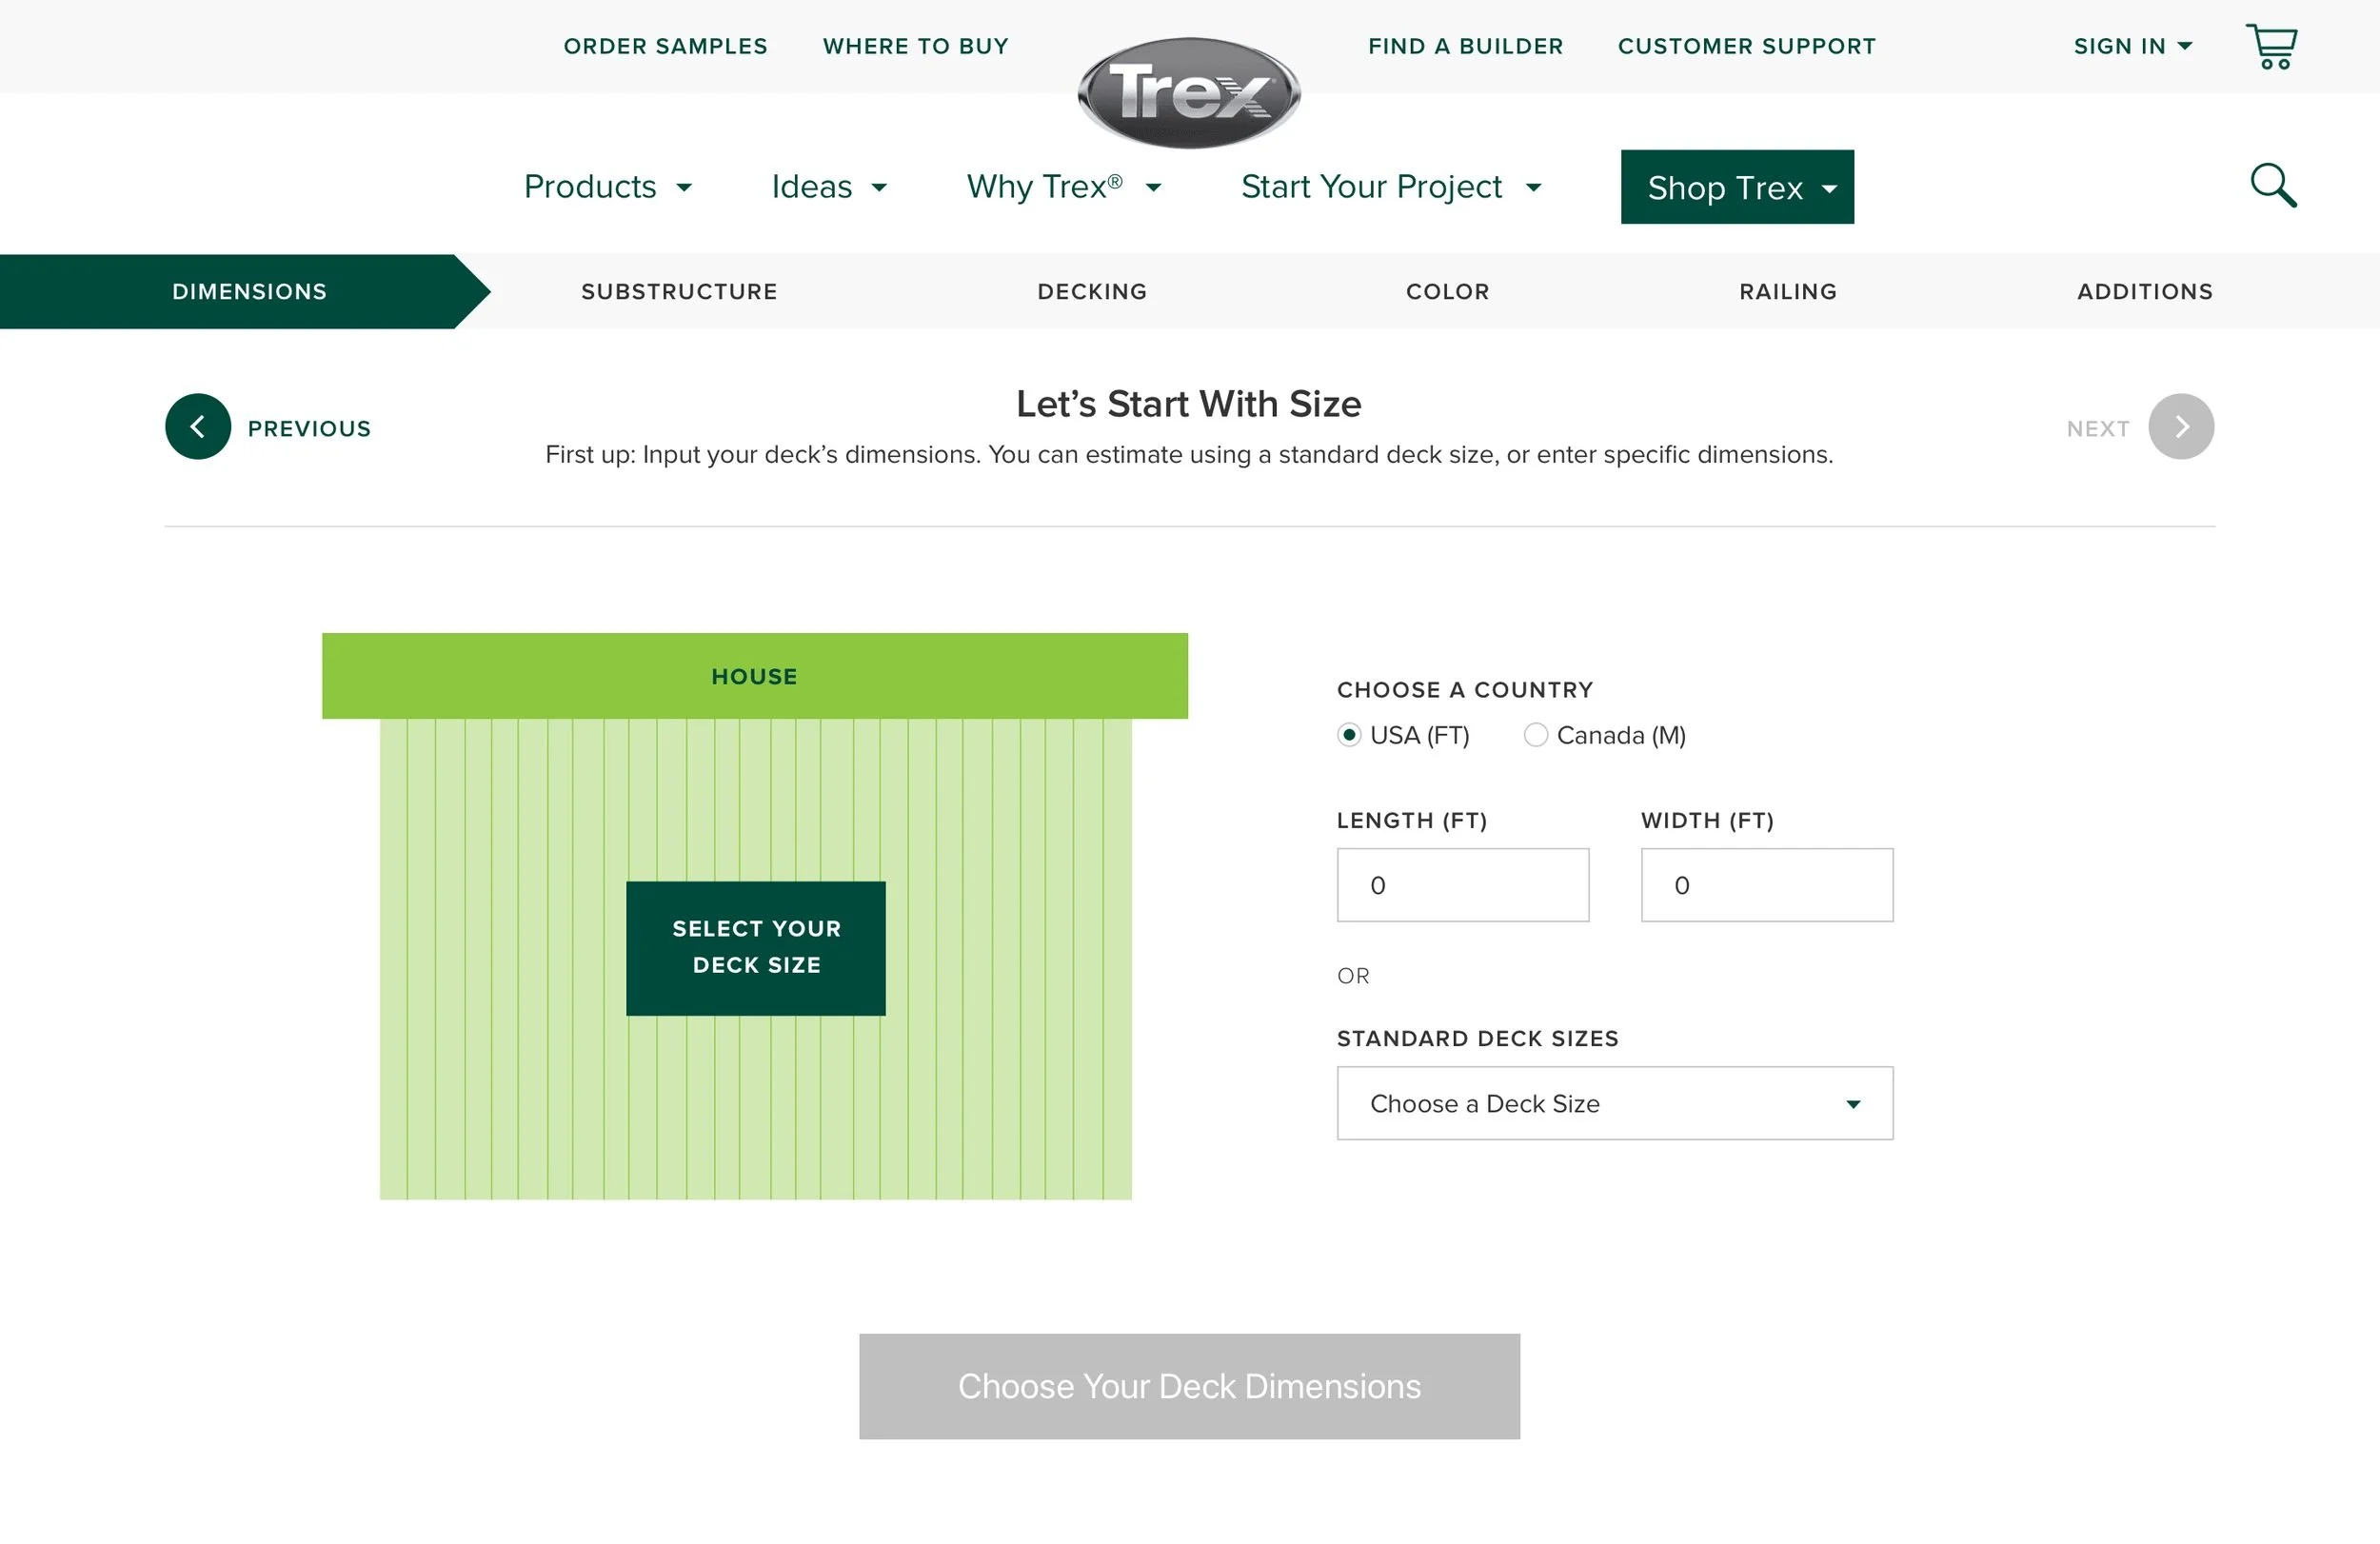
Explanation of Step 1: Here, users input deck dimensions. Once users choose a form of measurement, they will input their deck dimensions or choose a standard deck sizes. Depending on size, furniture, plants, and other accessories will auto-populate the light green deck to show what layouts may be accommodated on that size deck.
STEP TWO:
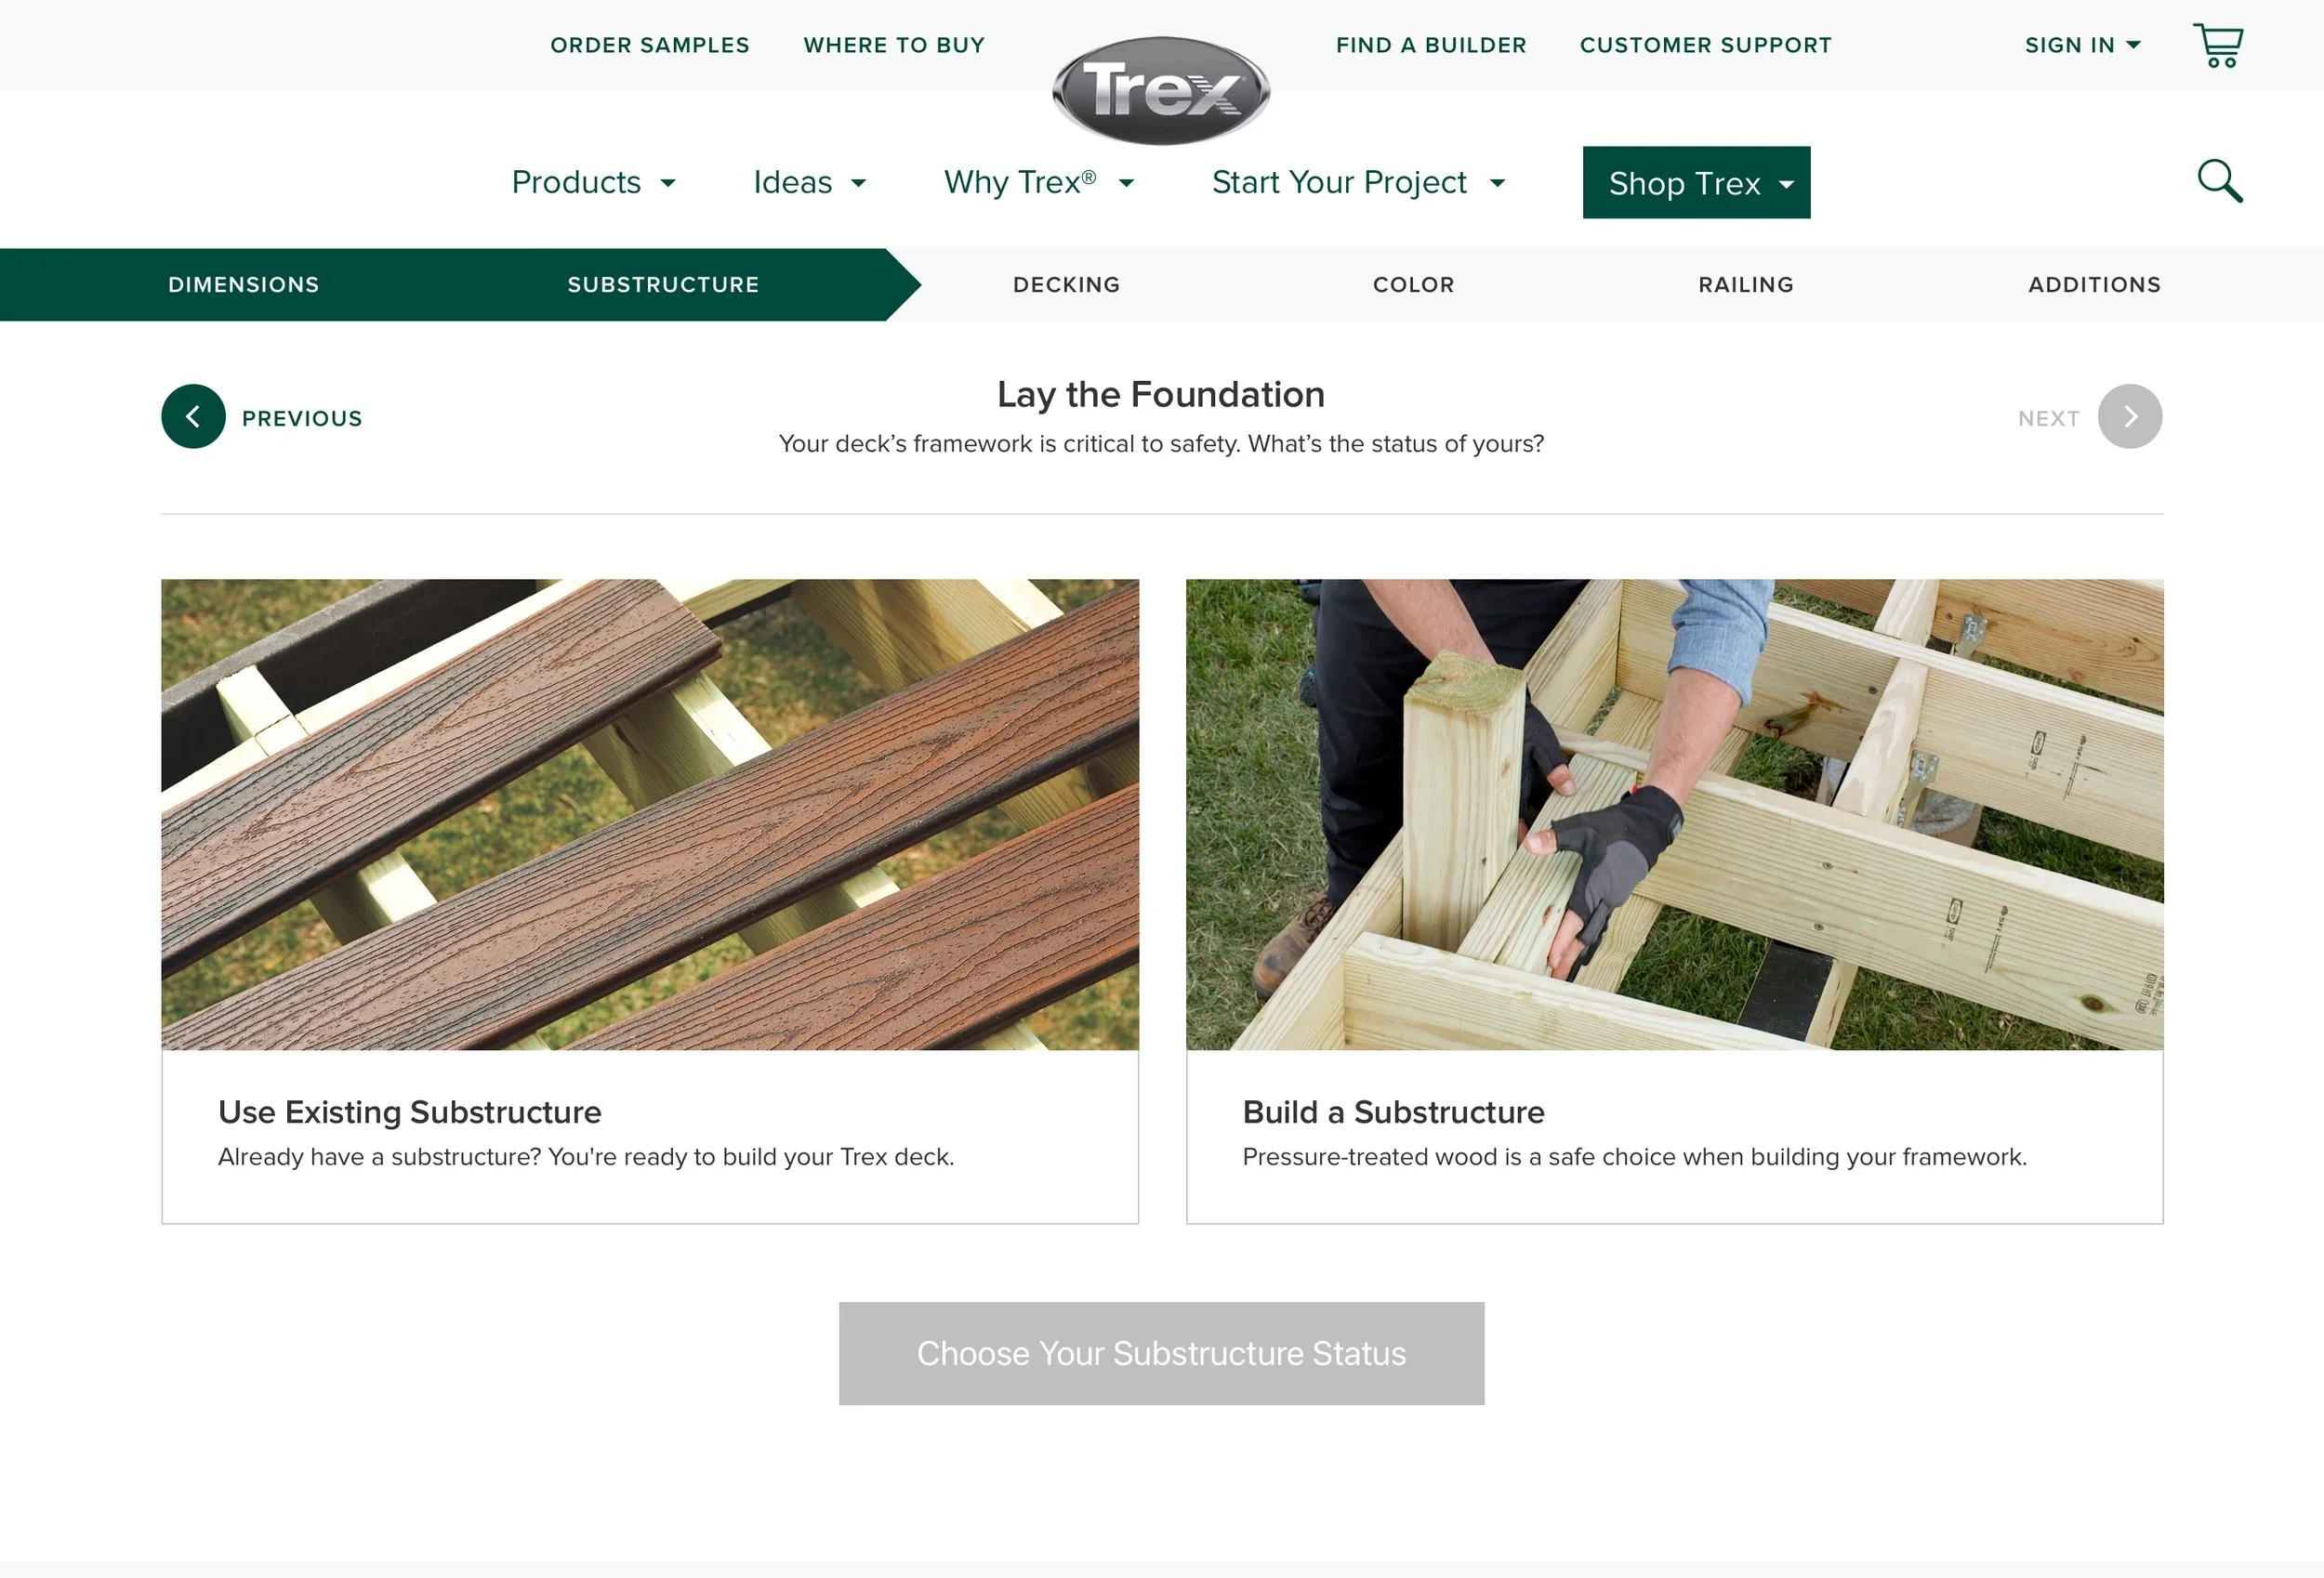
Explanation of Step 2: Choose between existing substructure or if you need to build one. Selection will have a light green border, and the selection button will turn dark green after selection is made to lock in the user’s choice and move onto the next step.
STEP THREE:
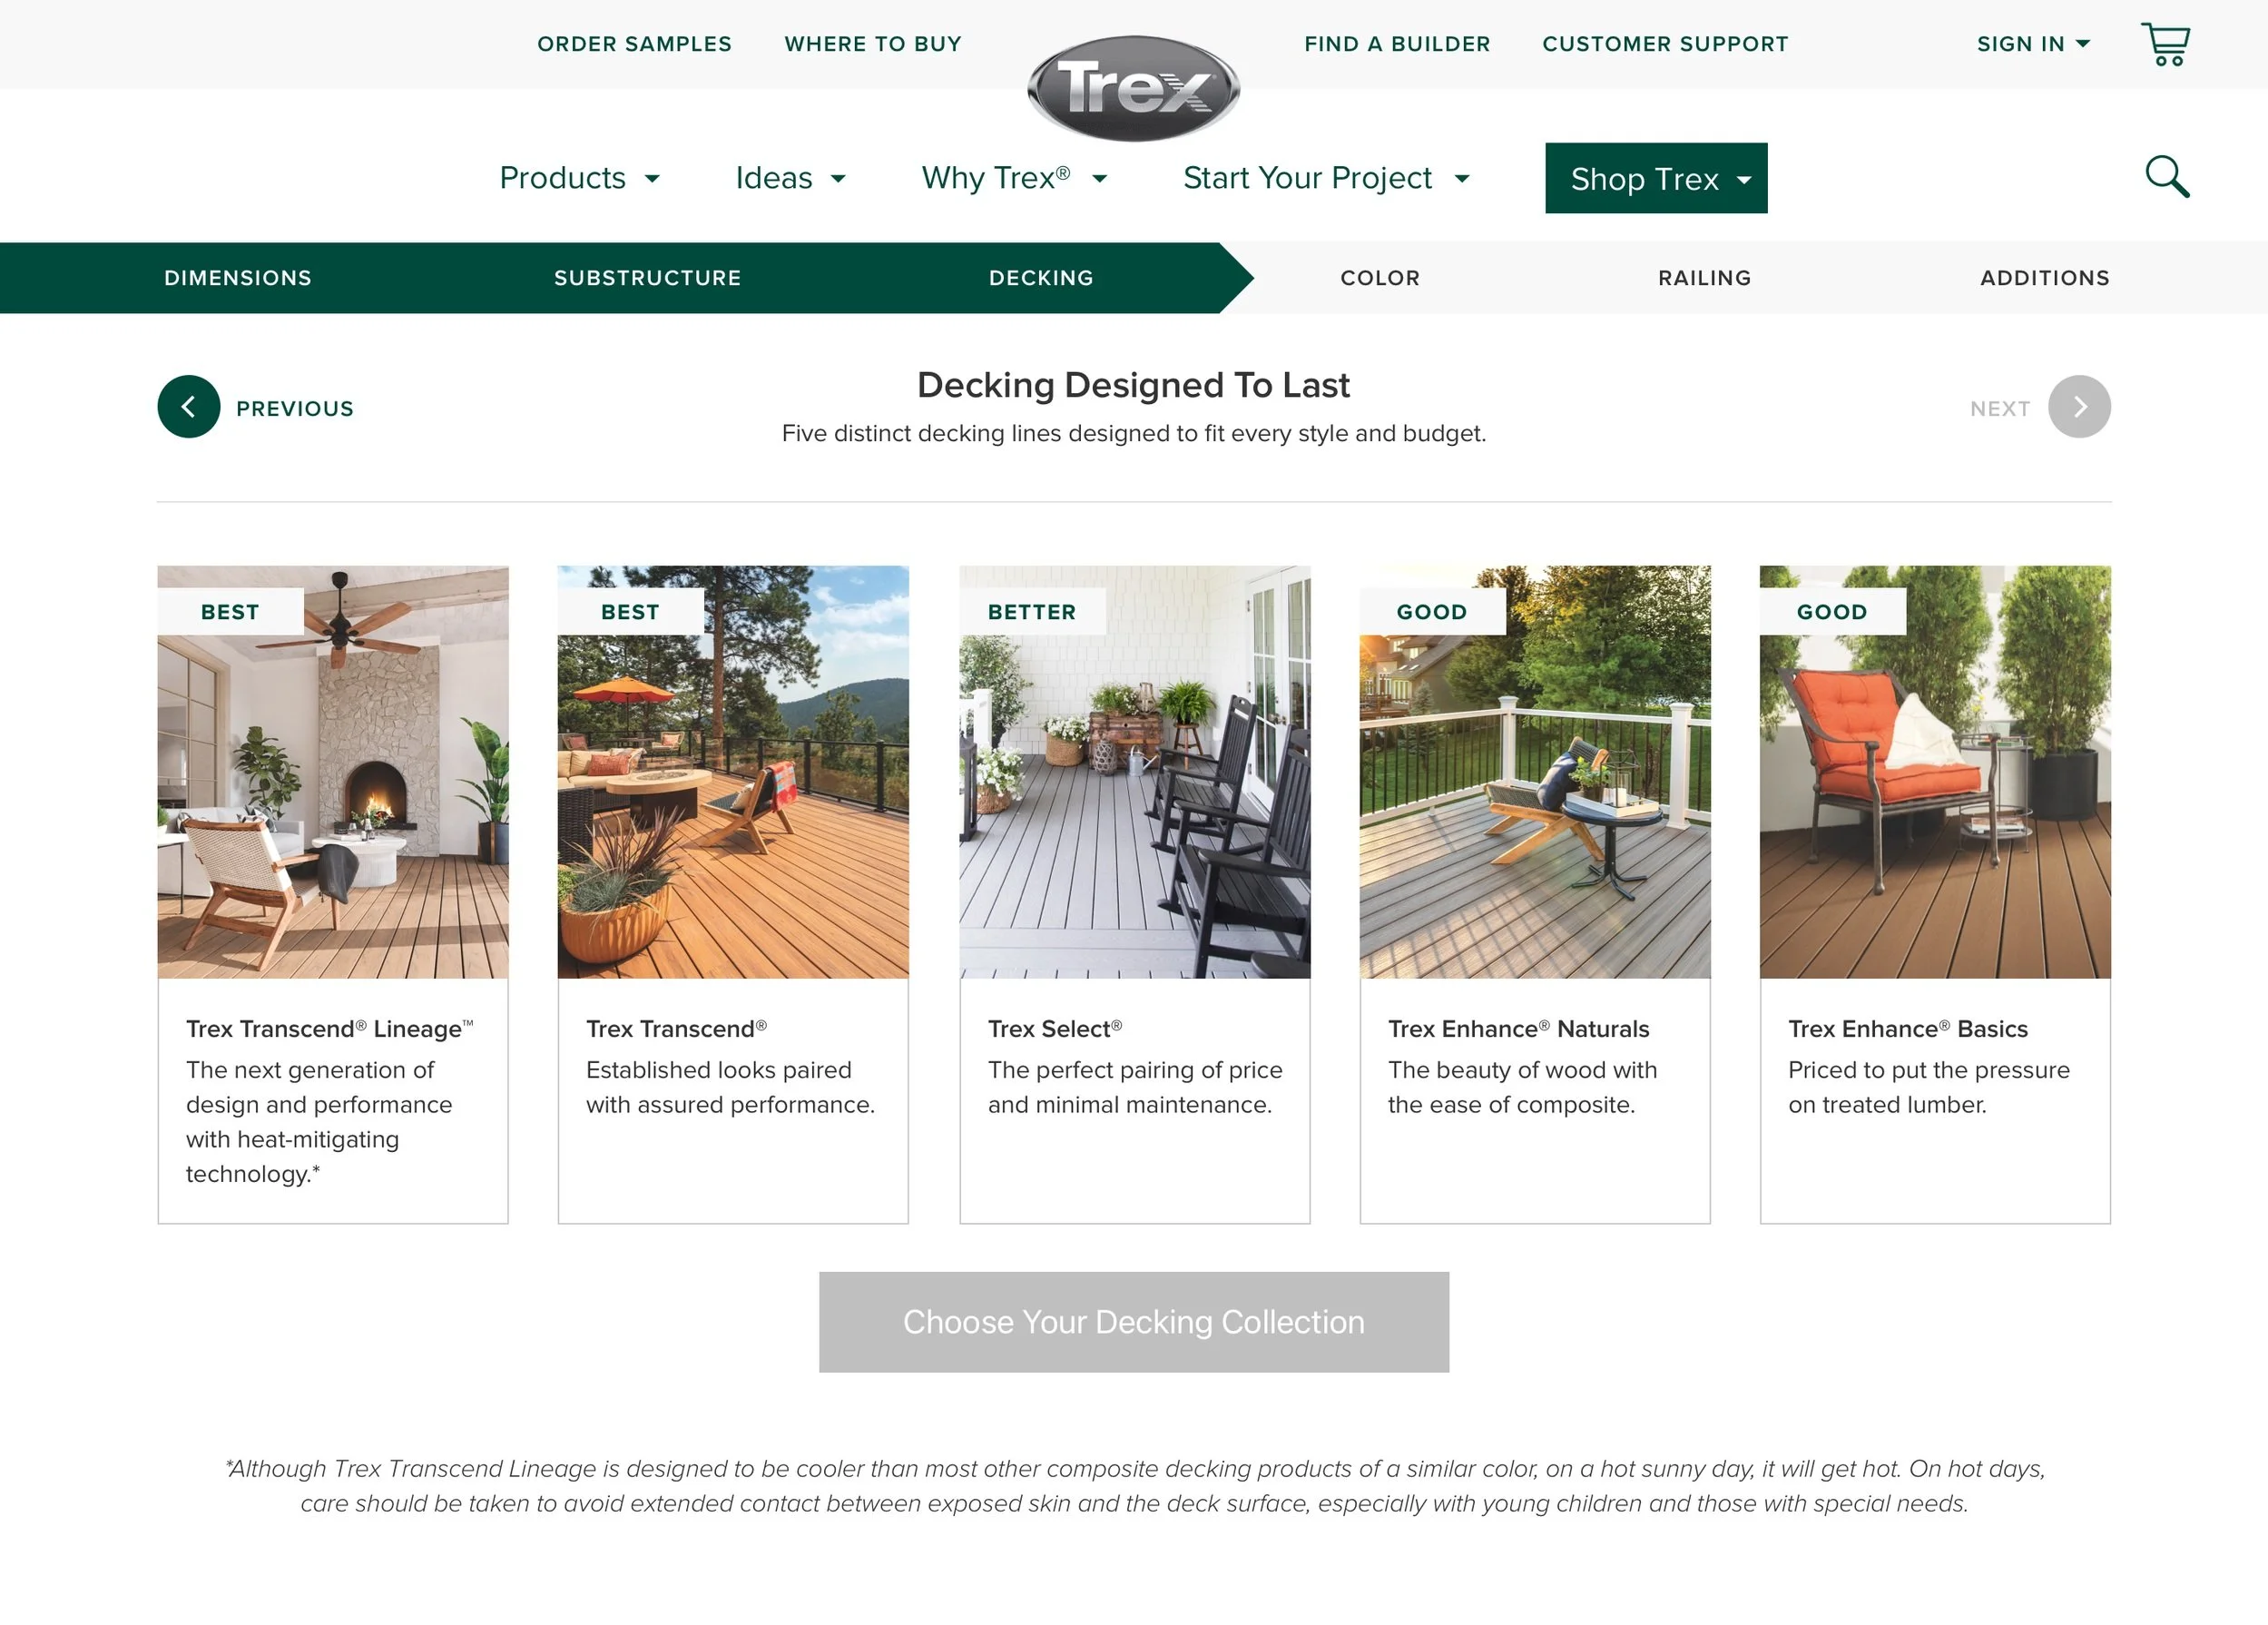
Explanation of Step 3: Choose between Trex’s five decking lines. Selection will have a light green border, and the selection button will turn dark green after selection is made to lock in the user’s choice and move onto the next step. Legalese is added underneath next to the asterisk.
STEP FOUR:
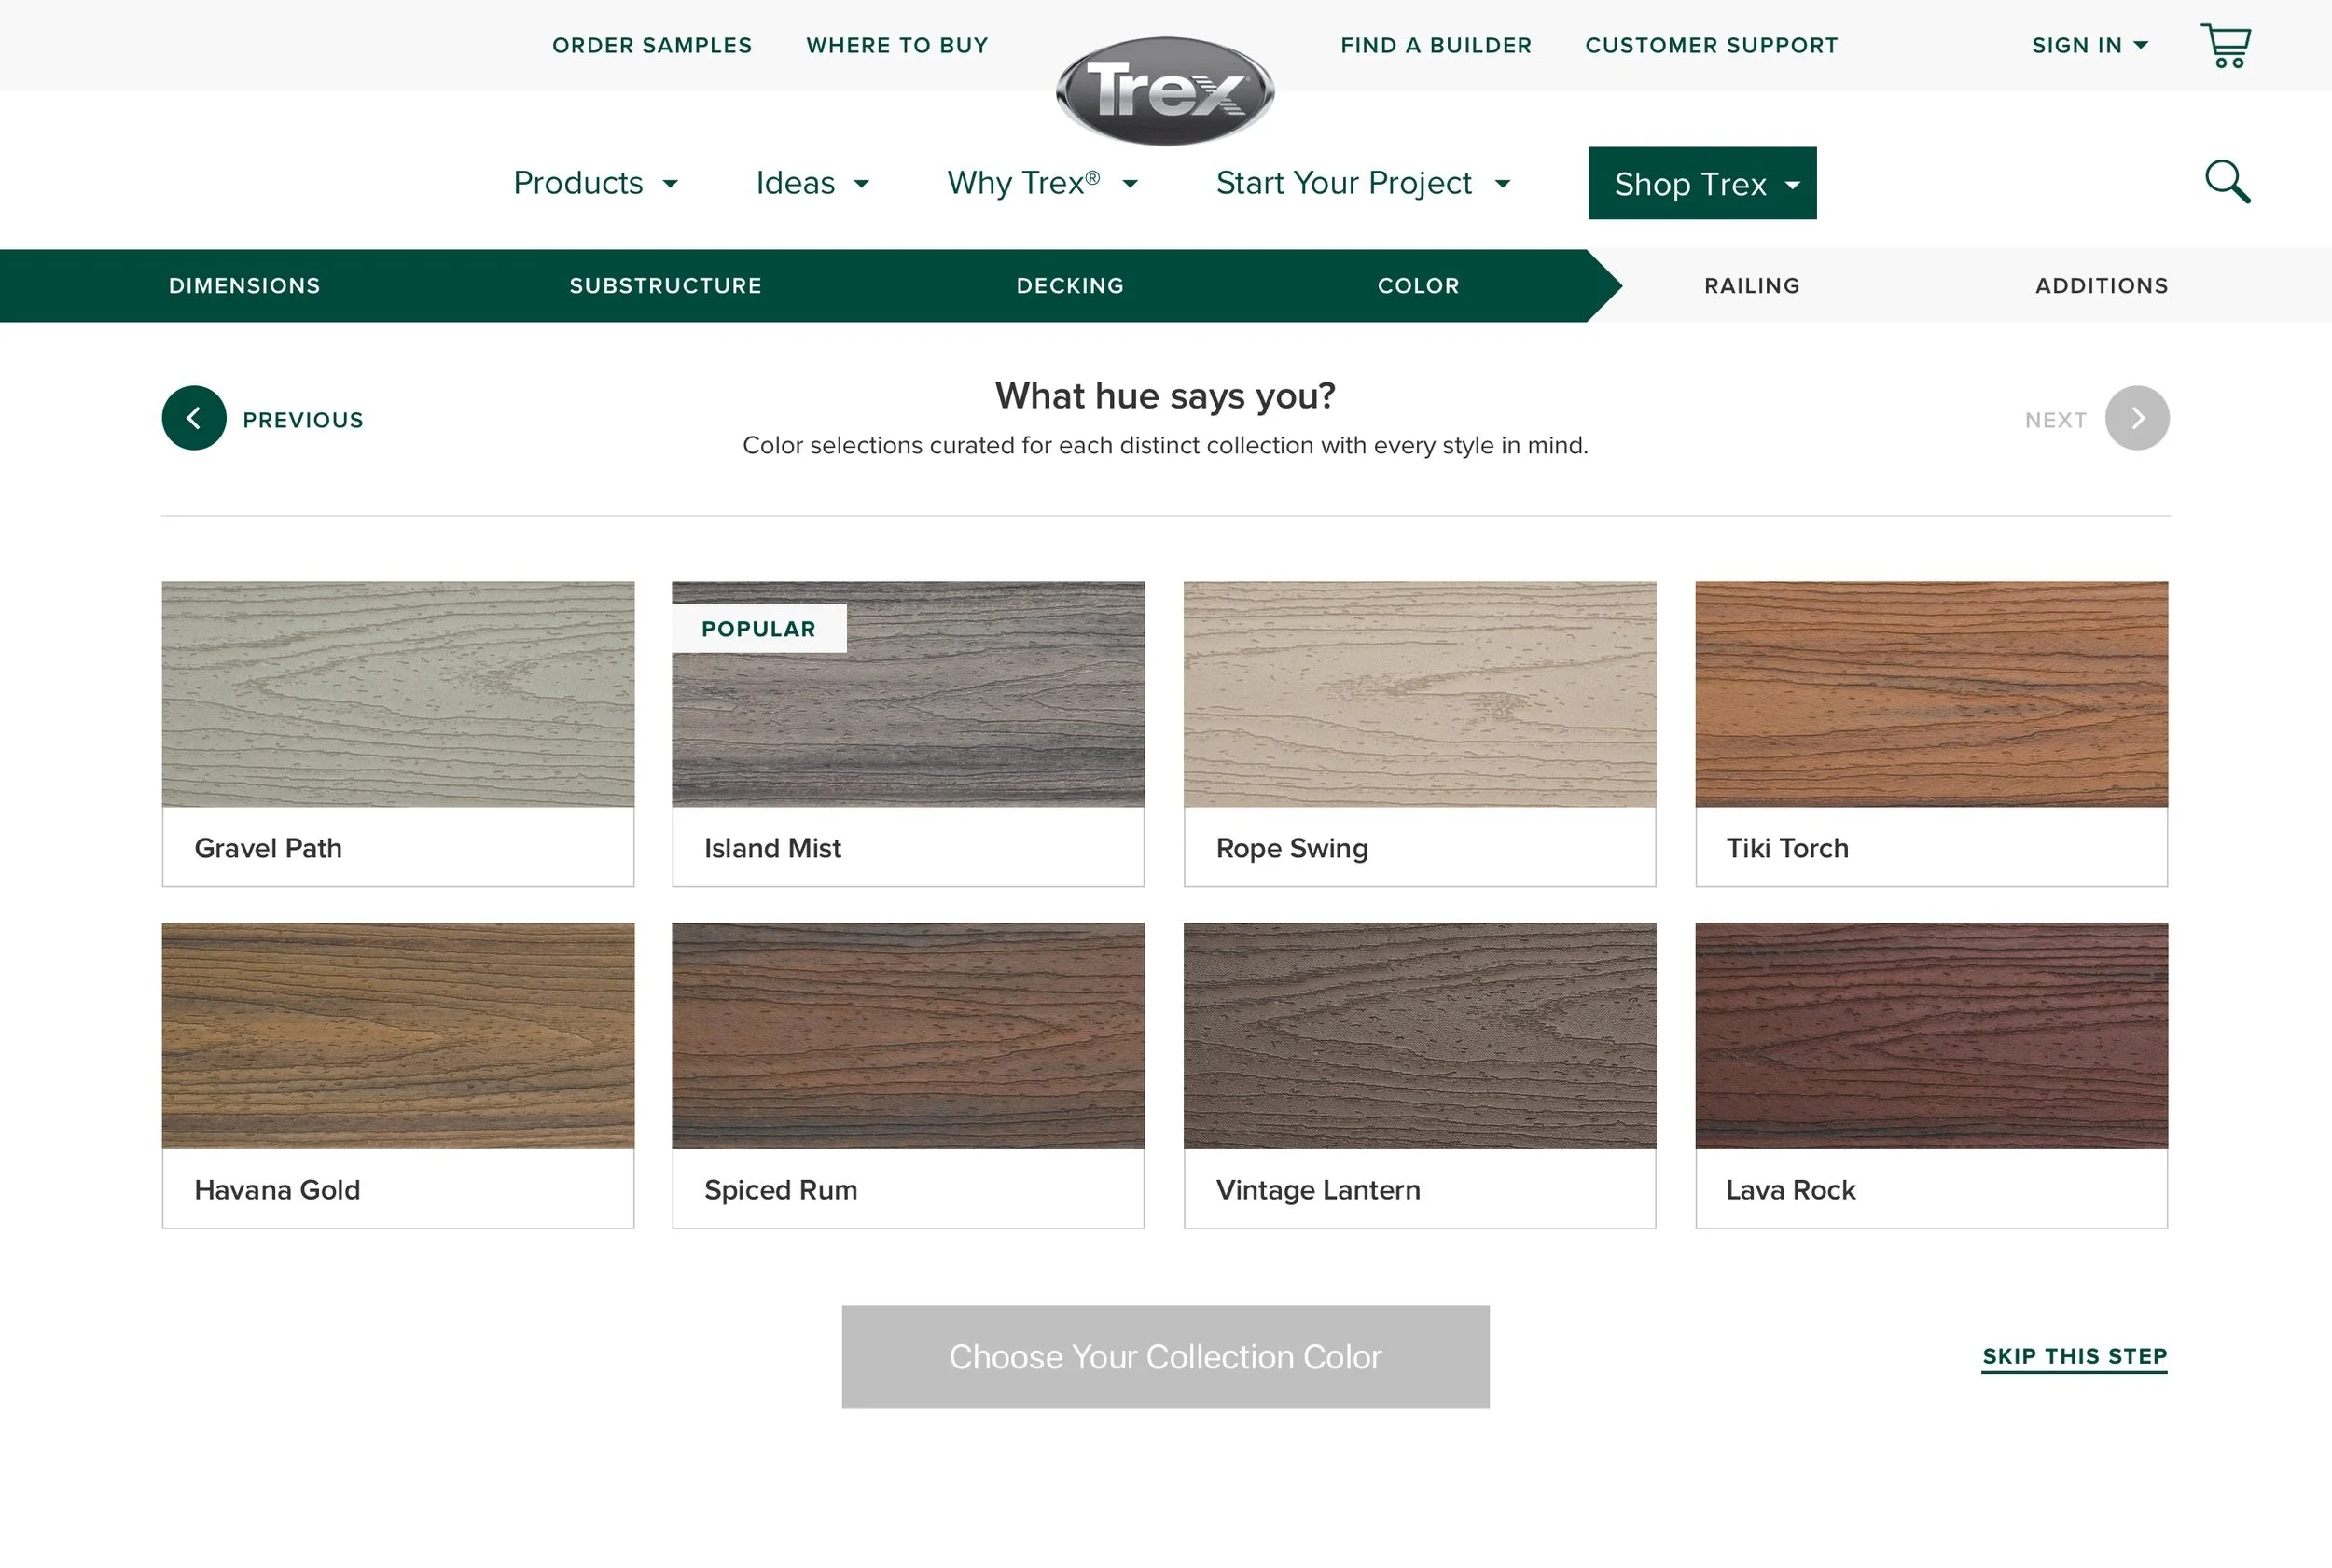
Explanation of Step 4: Depending on what decking collection the user chose, the corresponding colors of that collection will appear on this page. Users have the option to select a color that they already have a preference for, or skip this step if they have yet to make that decision. Selection will have a light green border, and the selection button will turn dark green after selection is made to lock in the user’s choice and move onto the next step.
STEP FIVE:
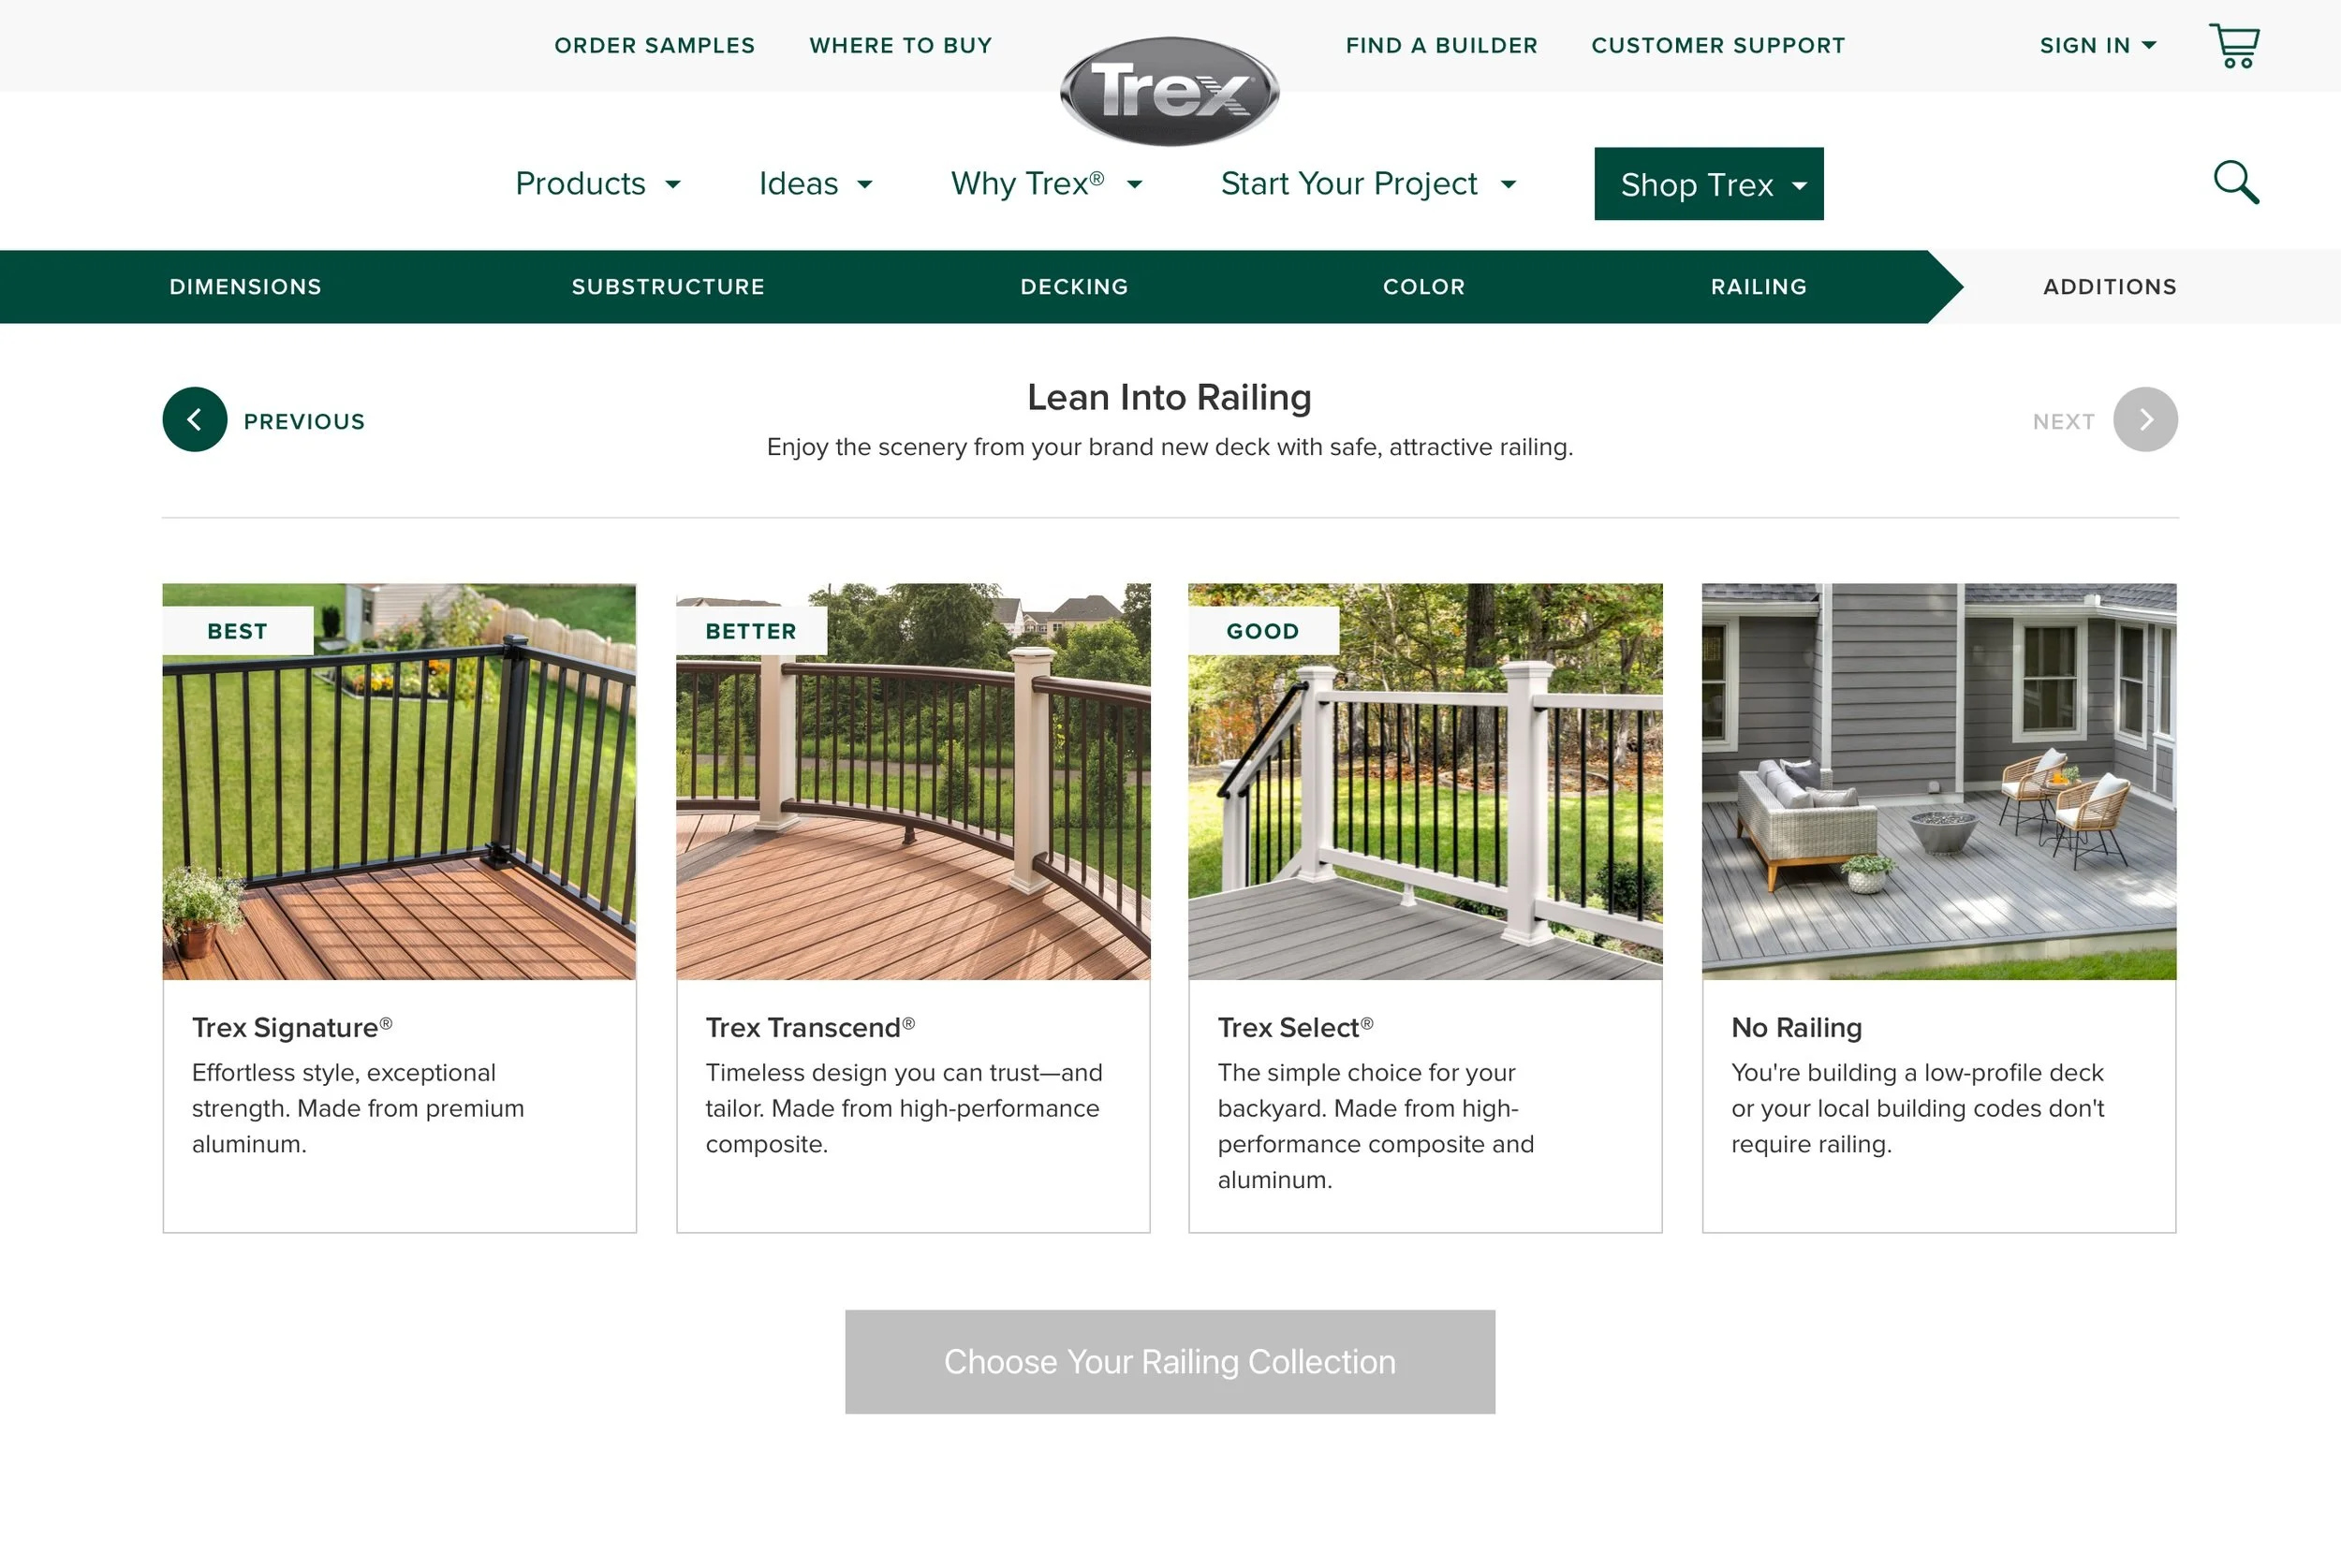
Explanation of Step 5: Users choose between different railing lines. If their local building code does not require a rail at their deck height, they are able to select the “No Railing” option. Selection will have a light green border, and the selection button will turn dark green after selection is made to lock in the user’s choice and move onto the next step.
STEP SIX:
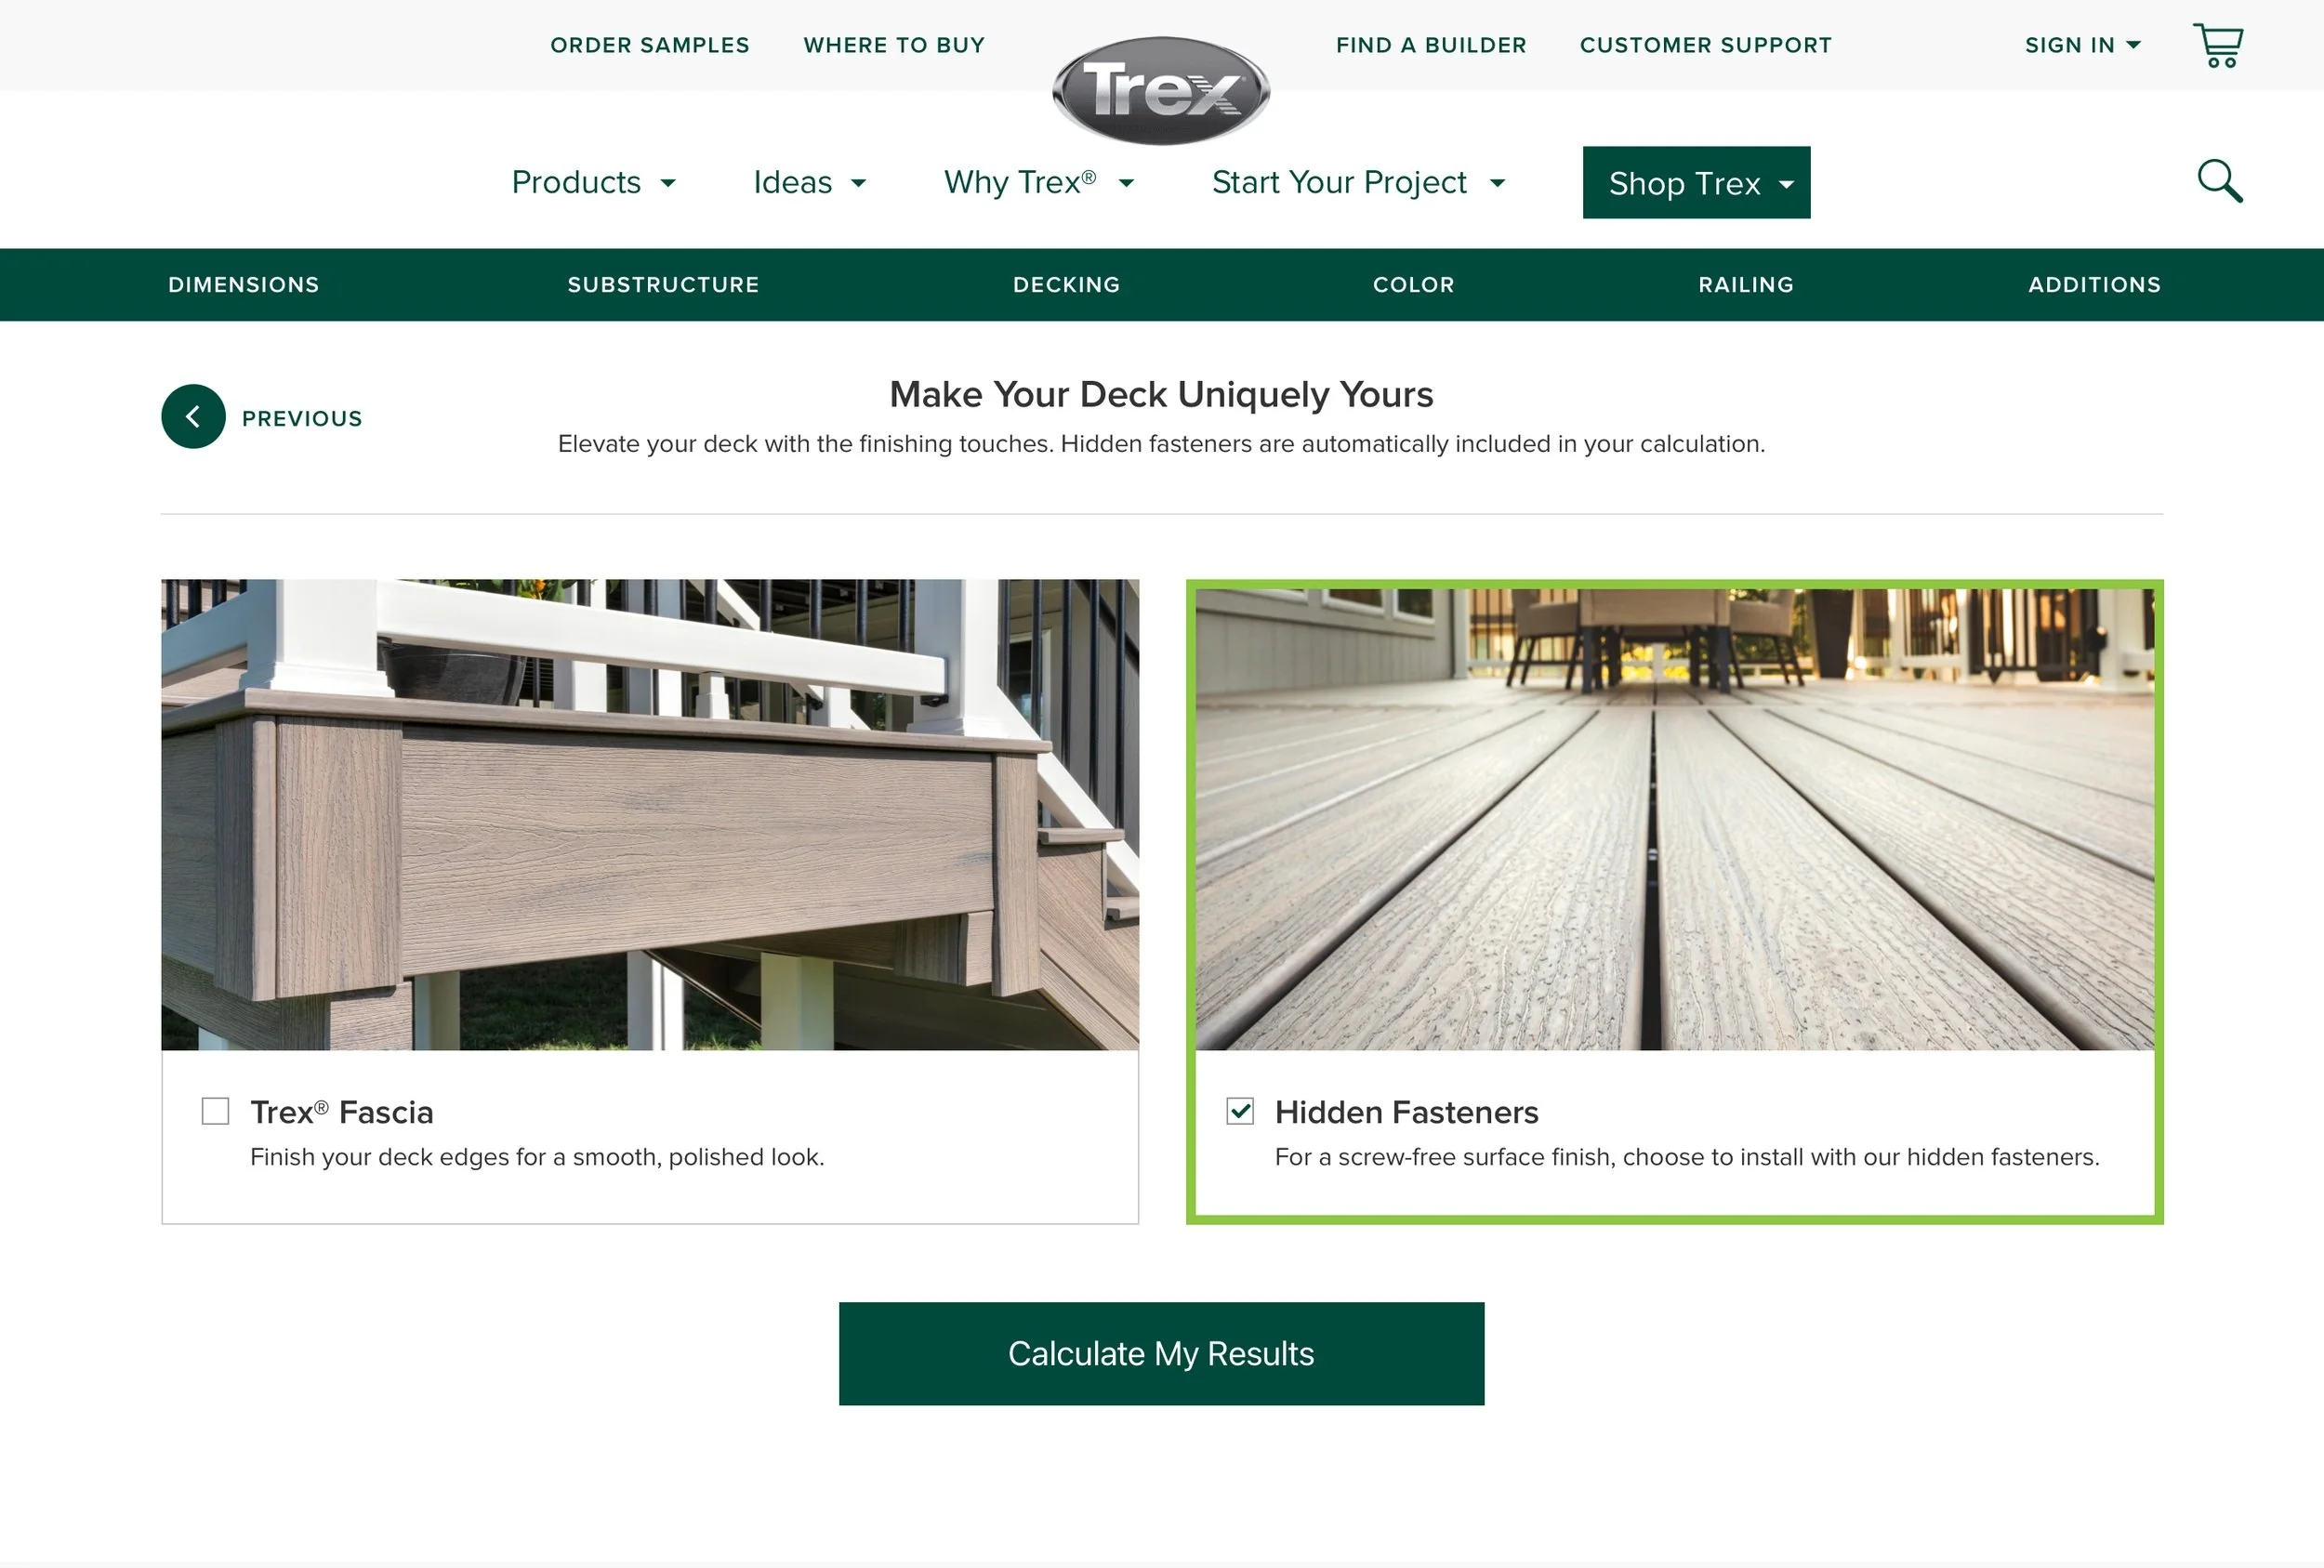
Explanation of the final step, Step 6: Users choose whichever add-ons they’d like to include in their deck materials estimate. The “Hidden Fasteners” option is pre-selected since it is an extremely popular option, but may be unselected at the user’s preference.
RESULTS PAGE - EMAIL CAPTURE
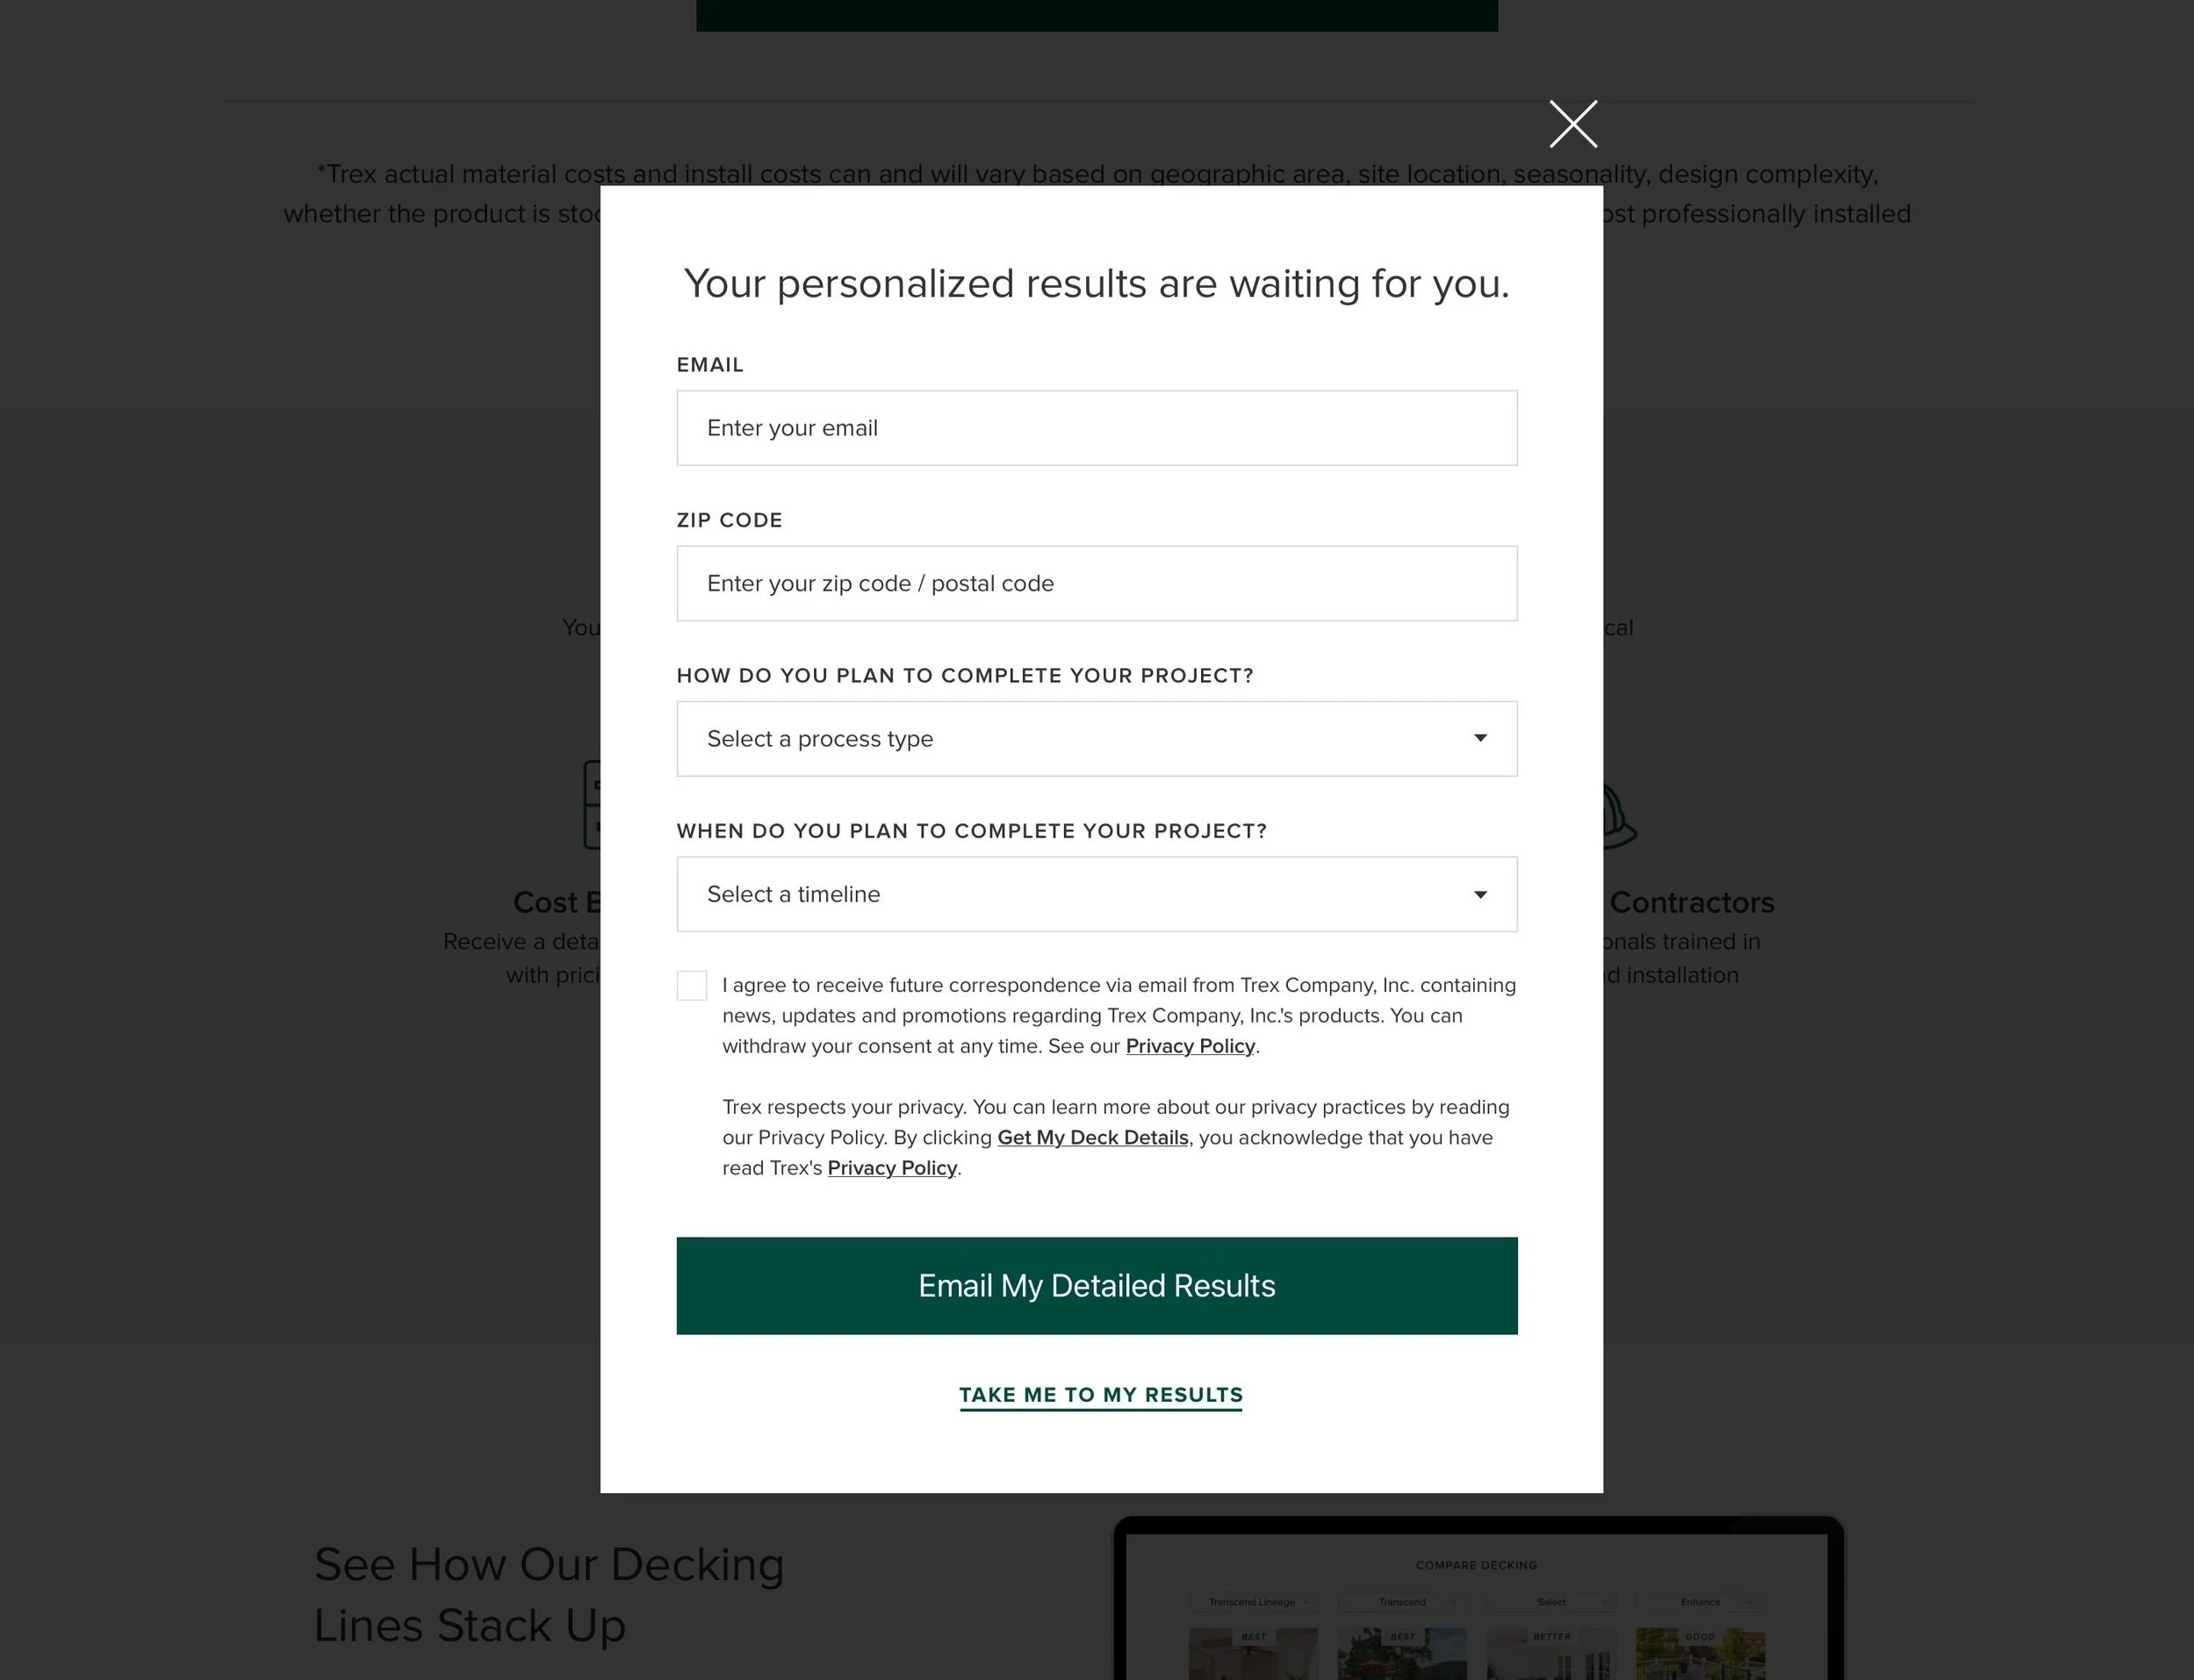
Email Capture: Once users click “Calculate My Results” in Step 6, they are brought to their results page, where they are greeted by this email capture. Users can have their detailed results emailed straight to their email upon capture. They can also opt out of the email by clicking “take me to my results”.
RESULTS PAGE
The Results Page: After capturing the user’s email, the user will view their tailored results page based on their selections. The green bar at the top of the page will be a sticky navigation, traveling with the user as they scroll throughout the page in case they want to see how different elements affect the cost breakdown. They have another opportunity to receive their detailed estimate to their email, as well as explore other tools and informative pages Trex has to offer.
EMAIL SENT AFTER EMAIL CAPTURE (QUICK ESTIMATE)
Explanation of All Collections Email: When using the “Quick Estimate” experience, this email is sent in lieu of the detailed email users get when completing the “Detailed Estimate” experience.

